Getting started
Quick start
From signing in to a finished retrospective with its action items.
This page takes you from signing in to a finished retrospective with its action items. You need an account on your team’s instance and a place in a team: a workspace owner or admin creates the team and invites its members. Every member of a team can start a retrospective, except observers.
Start a retro from a template
- Sign in. Skrüm opens the page of your team; Home in the sidebar brings you back to it.
- Select New session. The dialog opens on Retro.
- Check the Name. When the team has a current sprint, it is already filled in, for example “Sprint 43 retro”.
- Under Template, pick one of the templates shown, or select Browse to see all of them. The columns of the template appear under it.
- Select Create & open.
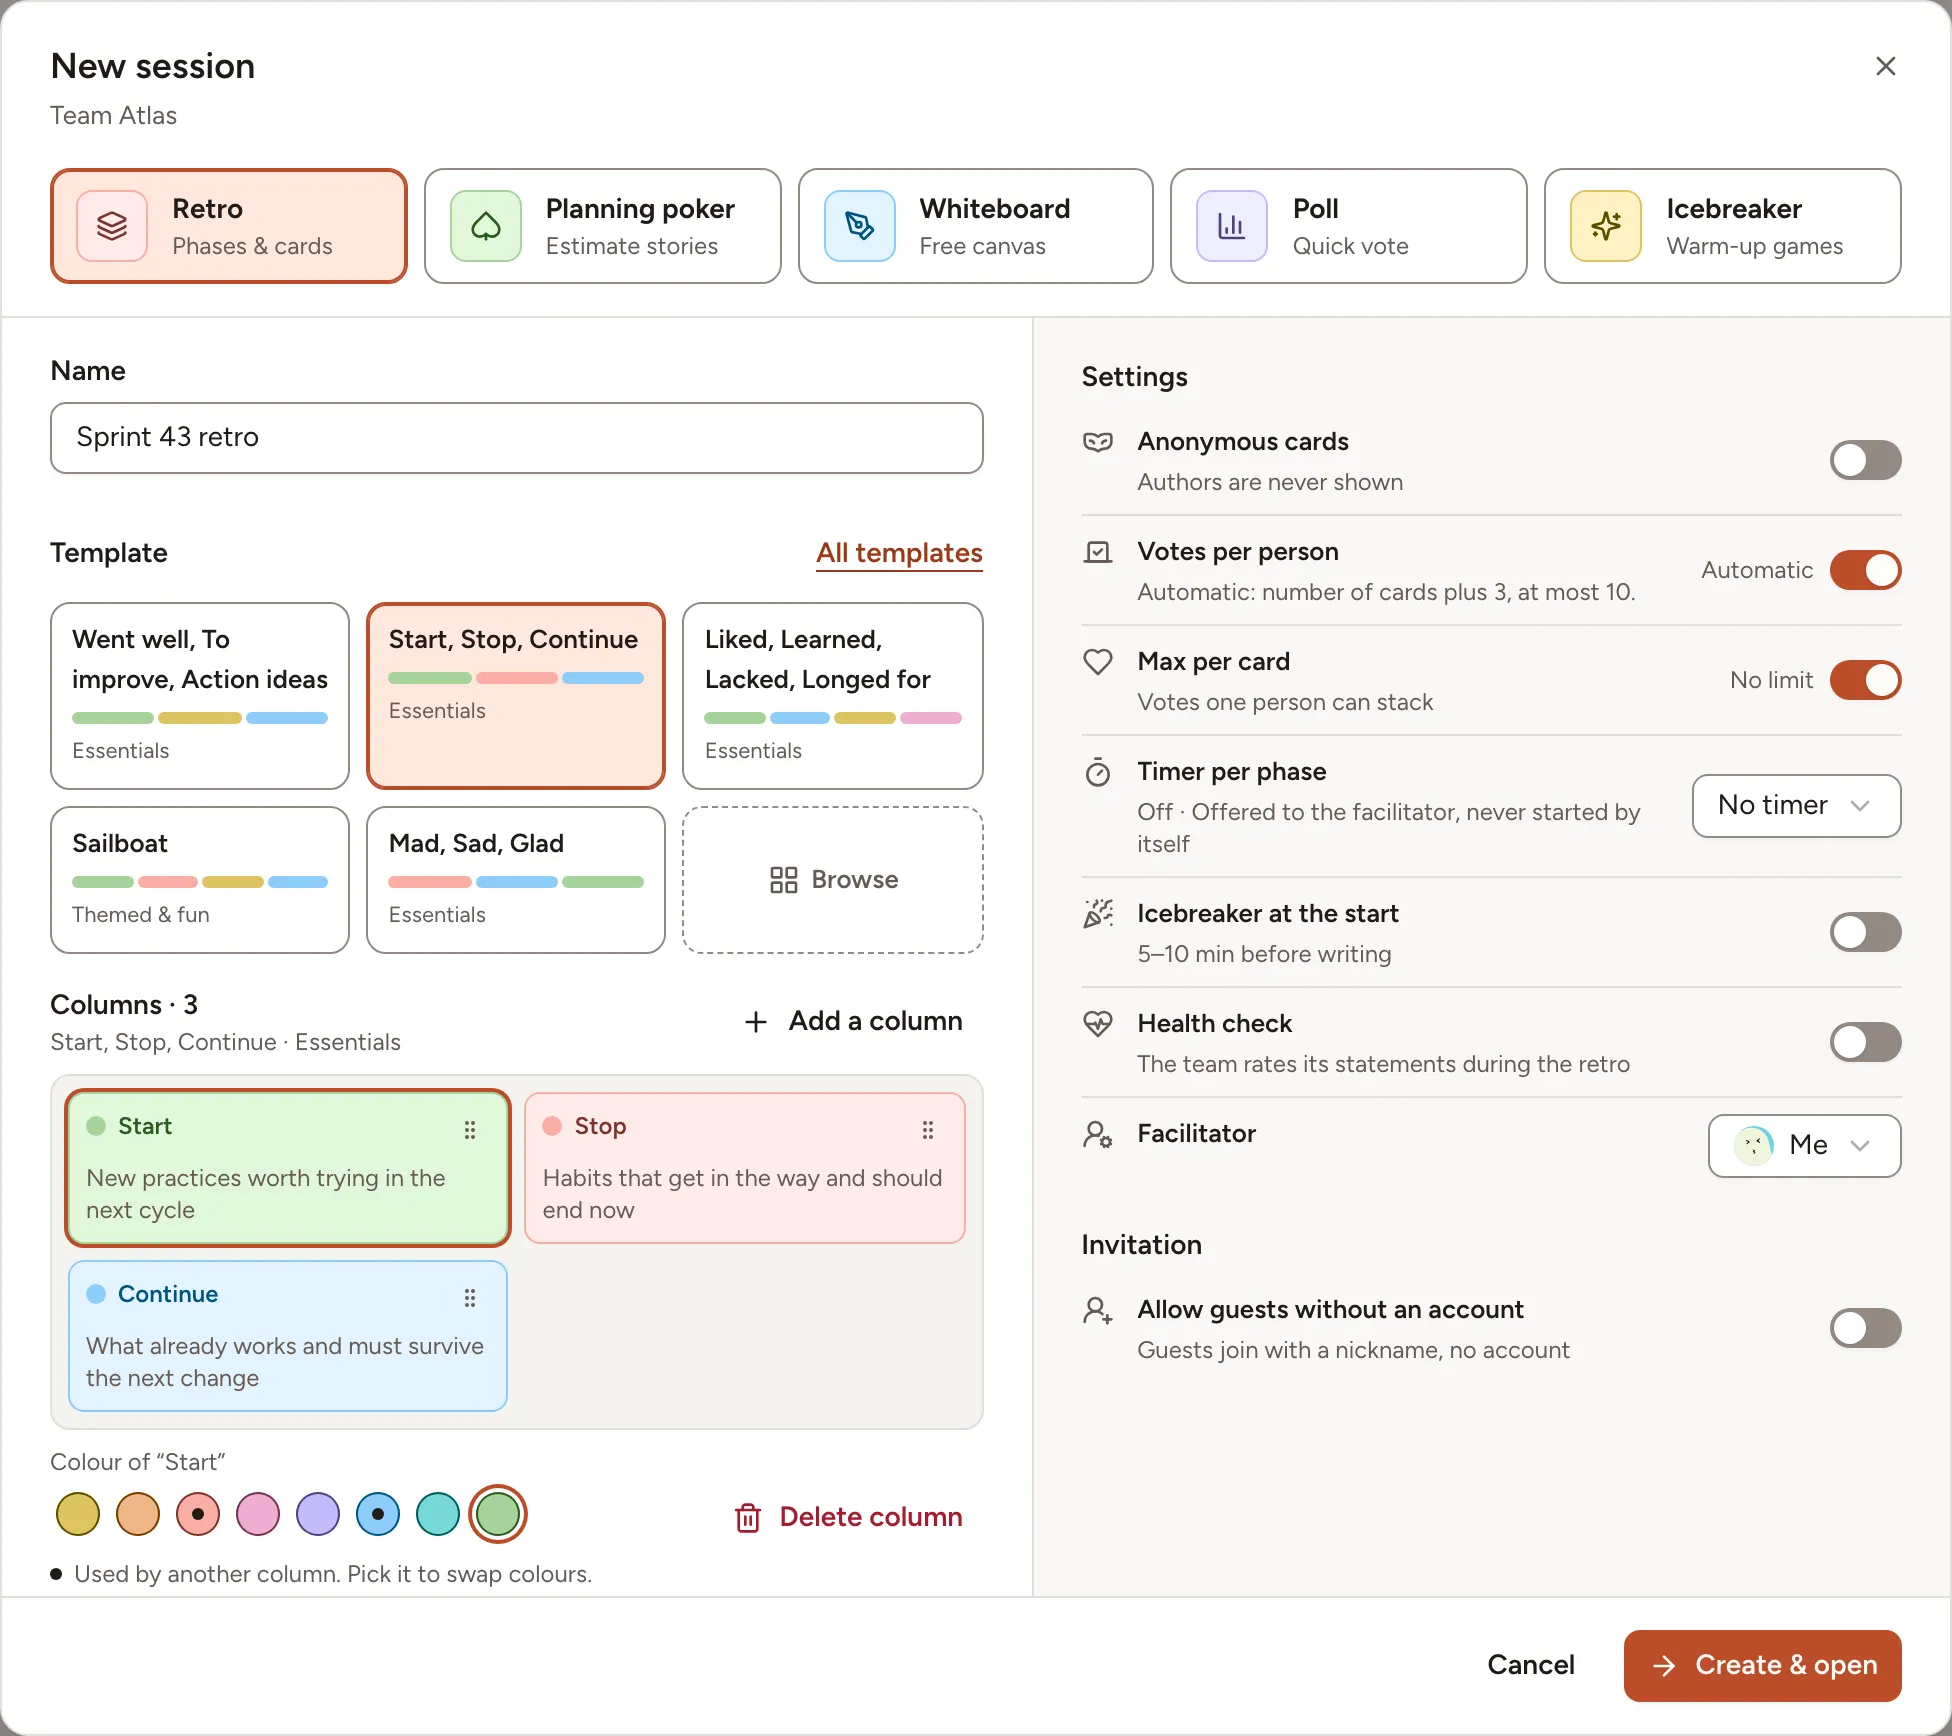
The board opens in the Writing phase and you are its facilitator: you move the retro from one phase to the next. To give that role to someone else, choose them under Facilitator before you create the retro. Create a retro explains every setting of the dialog, and Templates lists the templates.
Bring the team in
People who are signed in and belong to the team find the retro on the team page. You can also send them the address of the board from your browser.
For people without an account:
- Select Share in the header of the board.
- Turn on Allow guests without an account.
- Send the guest link, or read out the Session code.
Join as a guest describes what they see.
Write
- Select Add a card under a column.
- Type your card, then select Save.
During this phase your cards are marked Visible only to you, and the cards of the others show Hidden until the reveal.
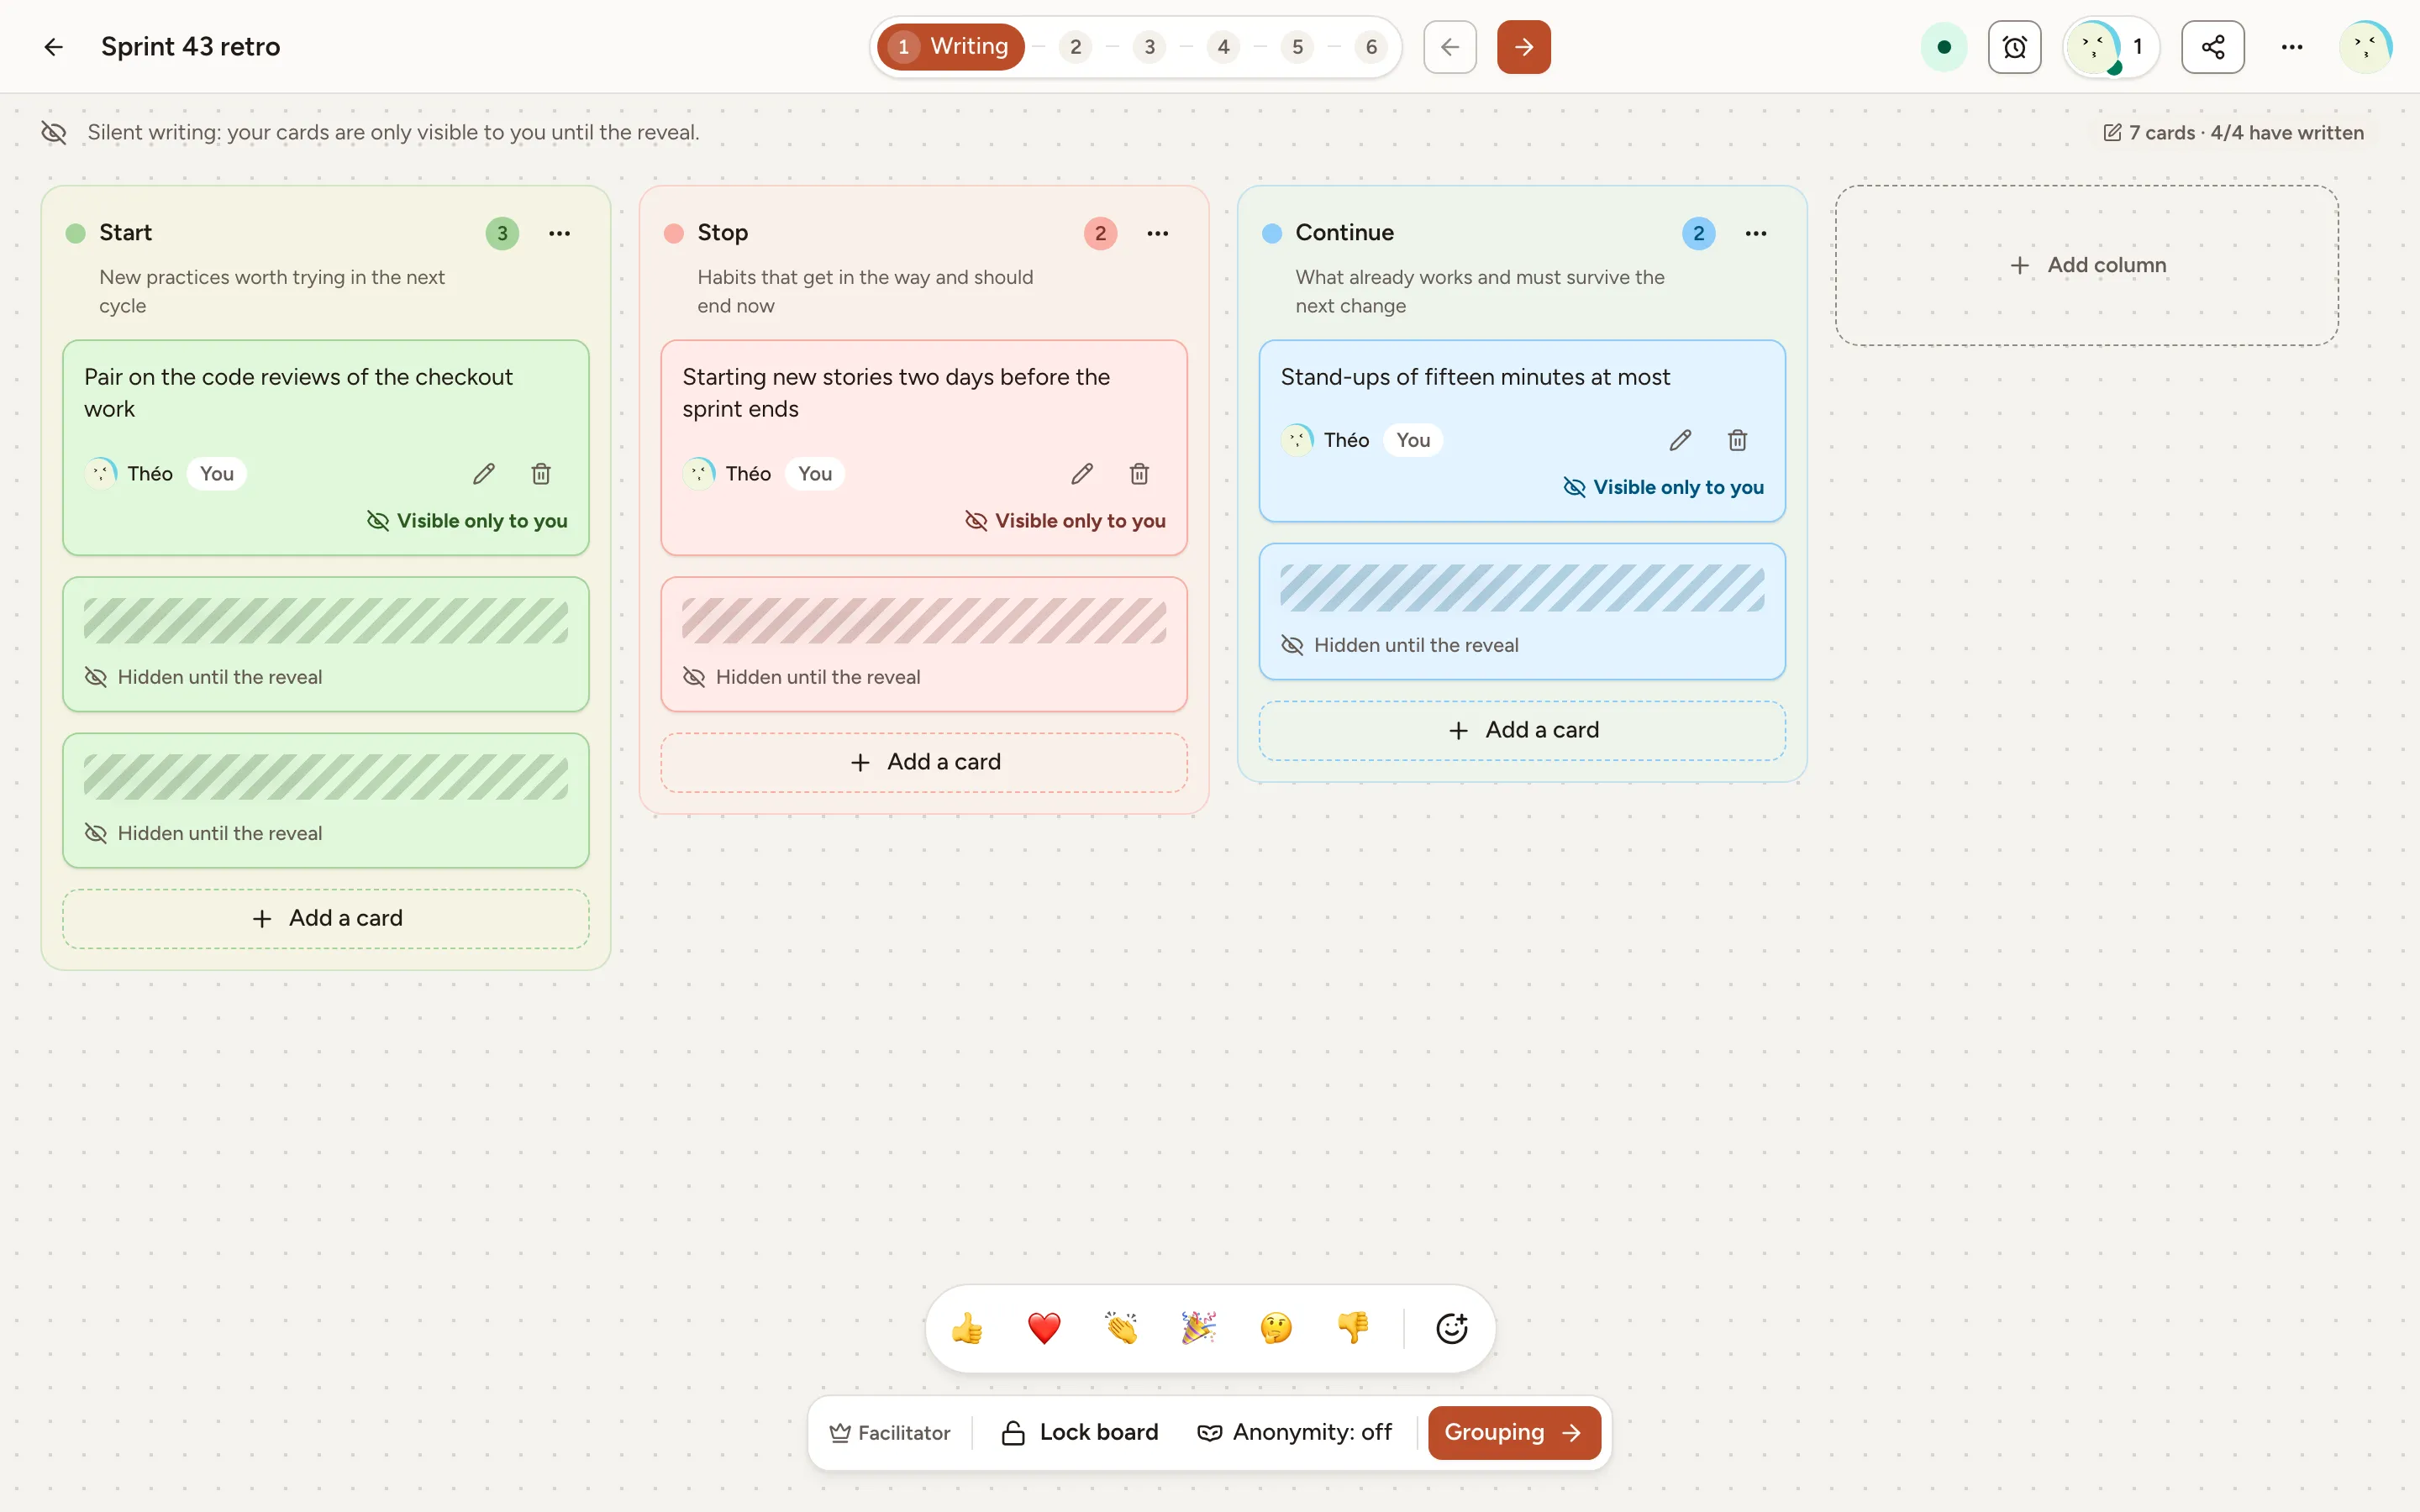
When everyone has written, the facilitator moves on: the arrow to the right of the phases is Next, and the button at the end of the facilitator bar is named after the phase it leads to, here Grouping. See Writing.
Group and vote
In Grouping, every card is revealed. Drag a card onto another to group the ones that say the same thing. This step can be left as it is. See Grouping.
In Voting:
- Select Vote on the cards you want the team to talk about. The number of votes you have left is shown above the columns.
- Select I have finished voting when you are done.
See Voting.
Discuss and add action items
In Discussing, the cards become topics, sorted by votes. The team talks about them one after the other. See Discussion.
In Actions, the most voted topics are listed beside the action items of the retro. To add an action item:
- Type it in Add an action item….
- Choose who owns it in the list that reads Unassigned, and a Due date.
- Press Enter, or select Create.
Adding action items is not reserved to the facilitator: members and guests can add them too. Observers of the team follow the session and change nothing in it.
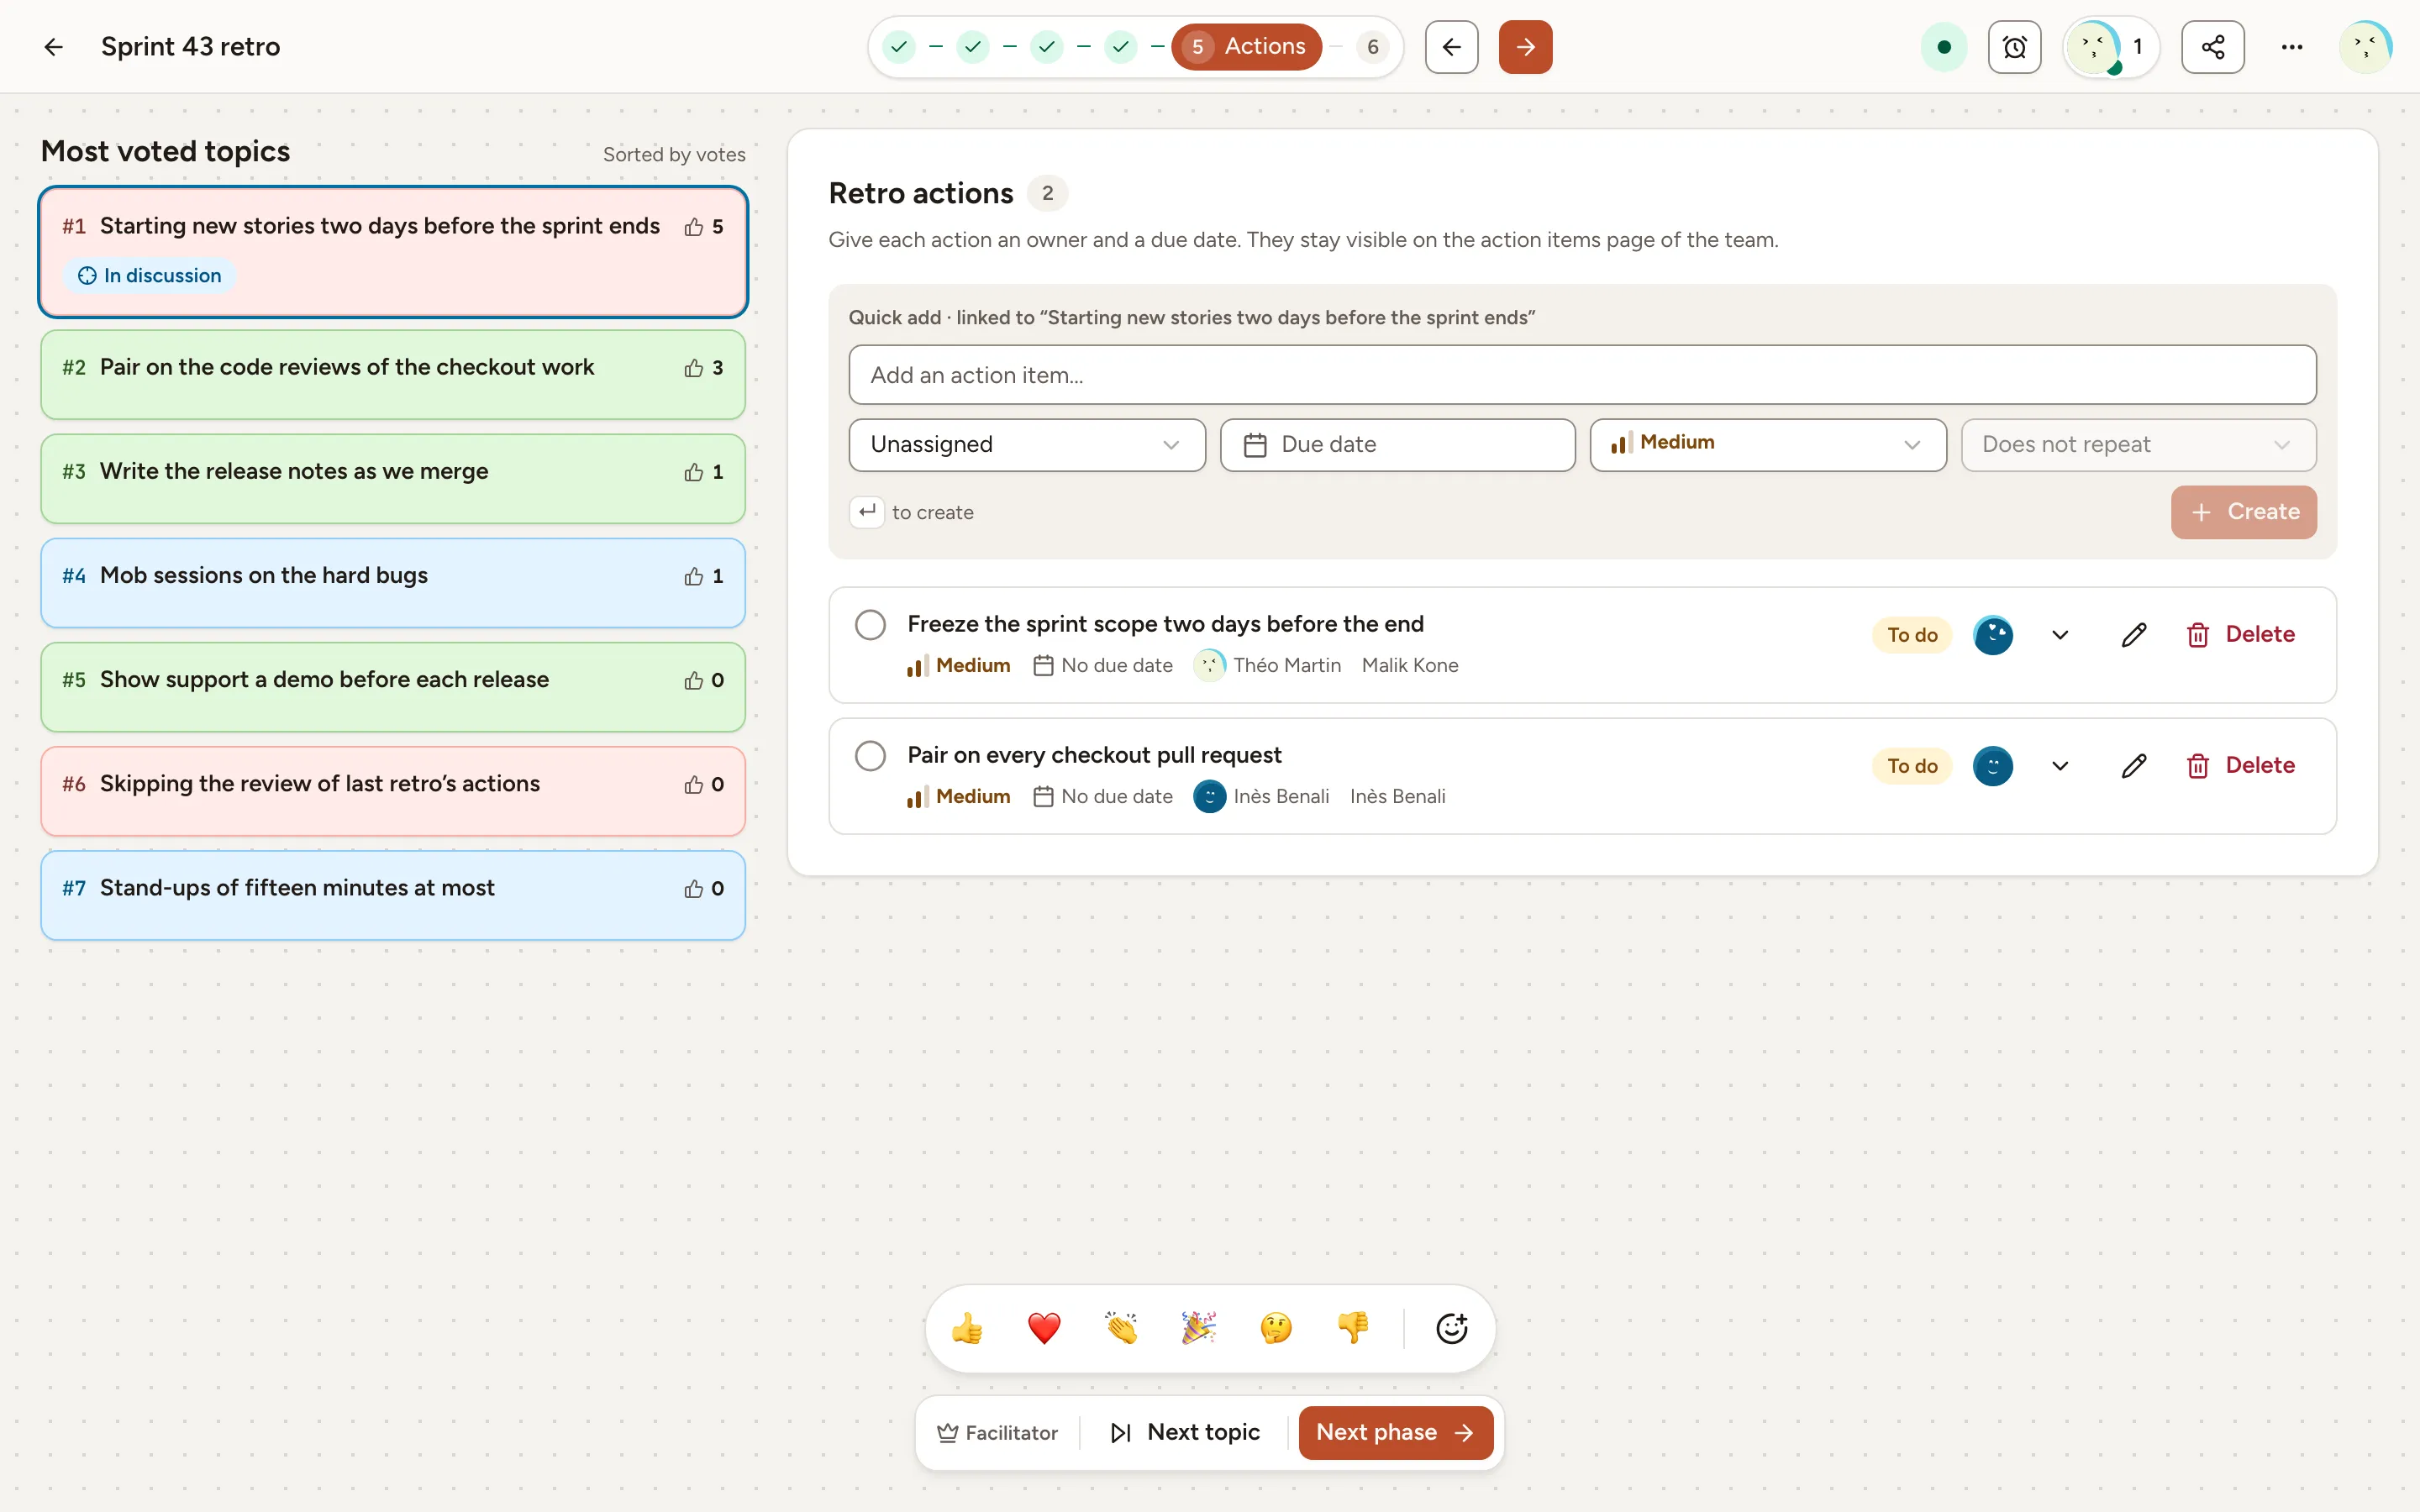
See Actions.
Close the retro
- The facilitator selects Next phase. In ROTI, each person rates the time spent in the session, from 1 to 5.
- The facilitator selects End session.
The retro is now Completed. It shows its results and, under Board, the cards as they were left. Its action items stay with the team: follow them in Track action items. See ROTI and close and Summary and sharing.